

 The next step I took in my journey to reducing my environmental impact and creating a more sustainable way of living was to begin my worm (vermicompost) bin. It’s a tricky endeavor in the desert. I read all the Pinterest posts on starting a worm bin and scoured the online forums and decided I was ready to dive in.
As much as I wanted a fancy compost bin I started off the cheap/free way and used only things I had around the house. I took an old, blue plastic storage container (like this one) from the garage and used a 5/16 in. drill bit to poke holes along the sides (not on the bottom) for aeration. Then I covered the bottom of the bin with newspaper, followed by brown packing paper and then organic potting soil. I began my kitchen compost container a week before ordering the worms so that I had something ready upon worm arrival. The worms will only eat decomposed food, and if you toss fresh scraps in the bin, they will wait until it has decomposed some before they move in on it.
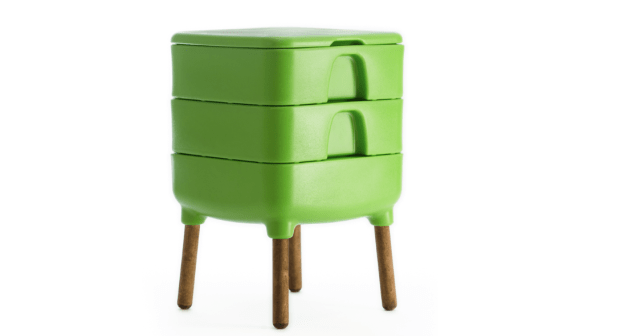
I do dream of a more attractive compost bin though, a sleek, green one that would fit compactly in my house. When this one came out from Uncle Jim’s Worms, I was hooked and hope to be able to purchase it someday:
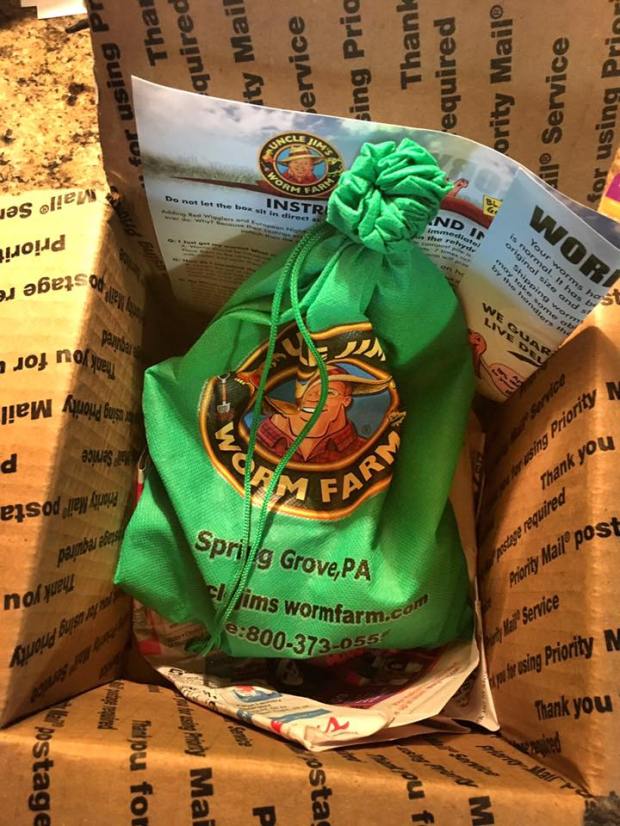
I chose to go with Uncle Jim’s (Red Wiggler) Worms for my worms, because of all their positive reviews and helpful tips on their website. Other companies didn’t have the same positive responses. Buying worms online is also a nice alternative if you don’t want to track down which nursery in your area sells them, or if the one that has them is far away. Ah the benefits of the internet. I ordered 250 worms through their Amazon site, and waited anxiously for their arrival. Brent had to laugh at my giddy excitement at receiving a box of live worms in the mail. It seemed to take forever, but I quickly forgot about the wait when I found the box marked “LIVE ANIMALS” and opened a wiggly bag full of worms!
This wouldn’t have been possible in the summer time. The worms arrive to your mailbox and in Arizona’s summer heat they would have died before they arrived, as they sat in the delivery truck, or certainly while sitting in the mailbox. I assume the same issues would happen in the winter time for extremely cold climates. But because it was December in Arizona the worms sat in the metal mailbox container quite comfortably until I picked them up.
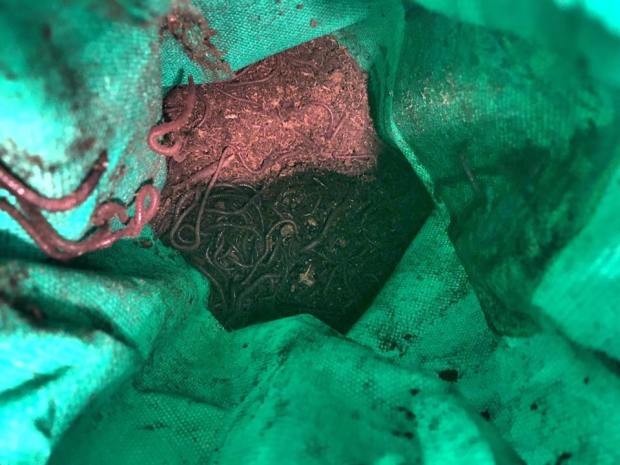 I may have ordered just 250 worms, but they reproduce quickly to manage the amount of food they are given. Now that they’re established, they definitely get through the scraps a lot quicker than they used to. In fact, I can give them about a new bag of scraps a week!
I’m now six months in and have already made a few of the rookie mistakes. First I was putting too much water, thinking it needed to be more damp than it was because of our dry, desert climate. It should feel like a damp sponge, but not soggy. Mine was a bit soggy at one point, and it was causing extra bug visitors, mostly little white ones. This helpful article explains a few ways to fix the bin that becomes too wet. If you keep the bin dry enough, just the worms should stay happily inside. If it dries out too much, they’ll try and escape. That happened once. Two worms wiggled through the holes and shriveled up on the cement outside the bin. Don’t panic if this happens to you, with a little trial and error, you’ll find your happy medium.
If the bin stinks, something is off, and it is probably too wet, or too acidic. When the moisture level is that of a damp sponge, and the proper food scraps are buried in the bedding, you shouldn’t be able to smell anything but a raw, earthy smell. This is why many people are able to keep their compost bins right in their kitchen!
Pro Tip: Freeze your scraps first. Freeze your composting bag and then place it into the bin, and cover with bedding. Through freezing, the scraps are broken down and become much more readily edible by the worms. The second benefit is that the added water as the bag de-thaws replenishes the bin’s moisture, the third is that freezing the scraps cools down the bin, which is especially important in the dry desert heat. Lastly, freezing keeps unwanted bugs from reproducing in the bin.
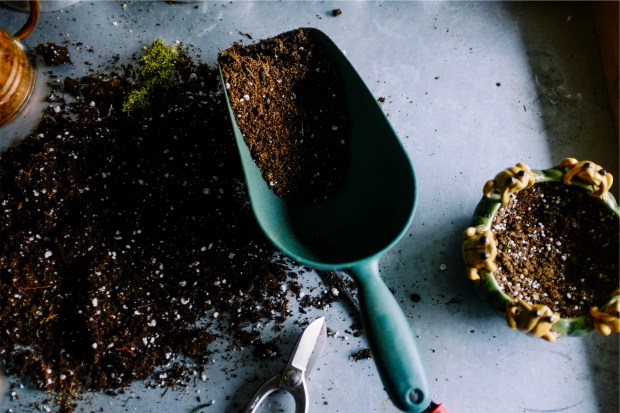
After about a month or so I was able to start separating the worm castings (worm excrement), which just looks like dark, rich soil and using them to start plants. I use it as needed, and am just extra careful not to scoop the worms out with it! After looking into other bedding options I discovered coconut coir. Then I discovered coconut coir bricks. The moisture and nutrient content of this all-natural bedding definitely outshone any other I read about and is definitely what I would recommend for your worm bedding. You can skip the organic soil like I used the first time and just use coconut coir.
How often do I have to feed the worms? I add new scraps every week or so. If the worms haven’t finished the last batch, I’ll let the next one sit in the freezer a bit longer. What all goes into my compost bin you ask?
- Primarily banana peels
- Egg shells
- Any vegetables or fruits that go bad
- Salad scraps that the chickens won’t eat
- Strawberry tops
- Garlic and onion skins
- Kiwi and mango skins
- Moldy bread
- Old plant leaves (only ones didn’t wither due to disease, because that disease can then live in your bin and be passed on to new plants)
Some parts, like the hard stem of the banana peel take much longer to decompose, as do avocado skins, and corn on the cob. I think the worms work at them slowly after they’ve eaten all of the good juicy stuff. As the worms work through the scraps the castings mix in with the soil/coconut coir and eventually the pile turns from a juicy pile of old food, into rich looking soil.
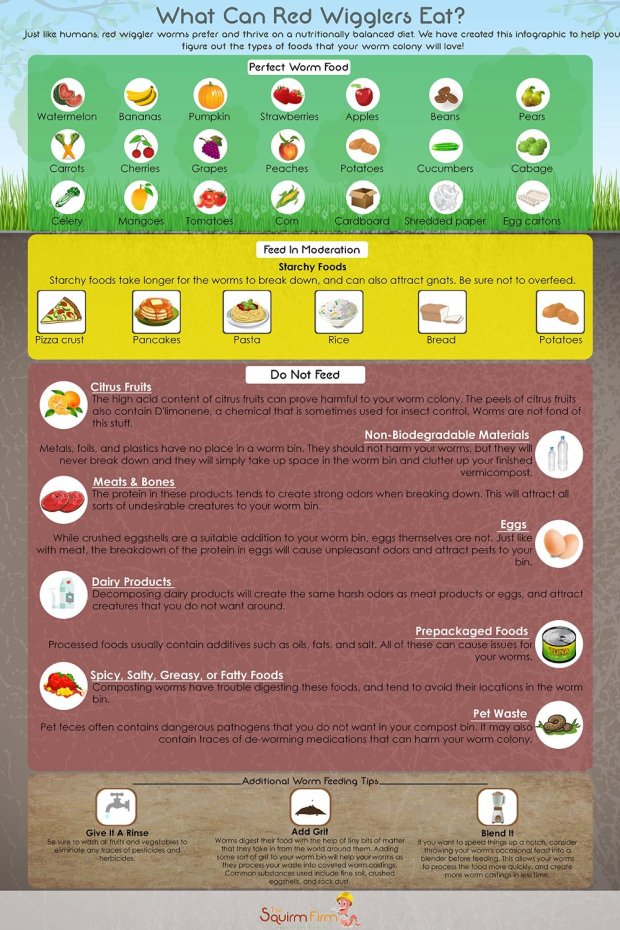
What shouldn’t you add to your worm bin?
I found this infographic to come in handy, and printed it to put on my refrigerator as a reminder. And I will add, coffee grounds, as much as I want to add them, (I drink a pot of coffee a day and the acidity level of the bin went through the roof) attract unpleasant bugs to my bin. Again, if there are extra bugs in your bin, you probably just have too much water, added a food that you shouldn’t have, or your acidity is too high. I now add coffee filters and grounds sparingly or toss the coffee grounds directly in with the new plant in the pot.
Have you tried a worm bin? I hope you’ll enjoy your first vermicomposting project as much as I did! My plants are lush and happy because of the added nutrients, and I feel much better about giving my scraps to a good cause, recycling! And for a pescatarian whose diet consists of mostly fruit and vegetables, that makes a big difference!
“When organic matter is separated and composted, you have less trash in the landfill, less incineration, and fewer pests rummaging through the household garbage bins.” ~ Uncle Jim’s Worms
See, you CAN make a difference, too!
NOTE: This blog includes affiliate links, which means I may receive a nominal commission when you make a purchase at no additional cost to you. I have not been paid for my opinion and any commentary on the efficiency of a product is solely my own opinion and experience.

An inspiration, for sure. Thanks for the enlivening version of vermicomposting in a desert setting!