


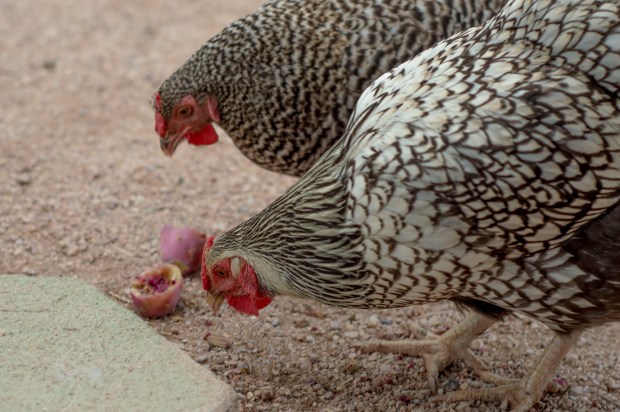
The mighty Prickly Pear holds within it a powerhouse of benefits. It is rich in vitamin C and dietary fiber, low-calorie and contains antioxidant compounds. My desert tortoise uses the juicy cactus pads as a main source of nutrients, the local birds have figured out how to drill into the fruits and extract the sweet, almost magenta colored juice and seeds (and so have my own chickens), and in the Southwest region in general the pads, pulp and juice of the fruits have long been used for food (Nopales anyone?) and the treatment of wounds and other ailments. Combining the juice of many fruits creates such a concentration of nutrients that it must be had in moderation!
Native Americans often used prickly pears to make colonche, and certain varieties of the cactus possess psychotropic components, including mescaline, making the cactus fruits useful for making Ayahuasca. One of the most popular uses of prickly pear is as a hangover cure, and it has been used to reduce headaches associated with too much alcohol for hundreds of years. (Organicfacts.net)
When I realized that I had my own large, healthy Prickly Pear Opuntia growing right in my (literally) backyard, I set out to learn the ancient ways of harvesting and using them.
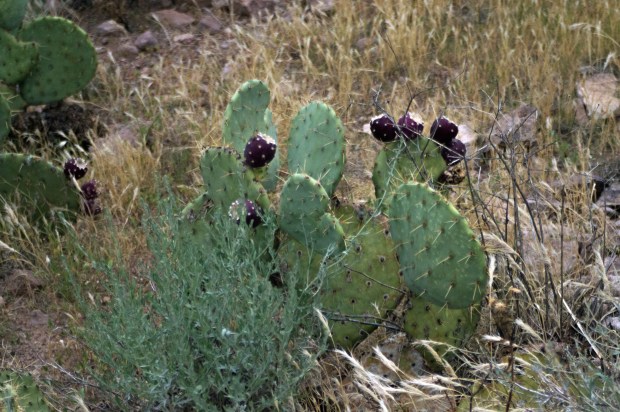
Actually many of the desert’s food sources call my backyard home. The house’s landscape, just outside of Phoenix and bordering the Tonto National Forest, has been left as natural possible, home to wild growing Mesquite and Palo Verde trees, Ocotillo, Creosote and five massive Saguaro cactus. The Jojoba shrub is a favorite snack for the goats and even my horse, who gobble down the Jojoba nuts and leaves like candy on trees. In the wild these plants provide food for the local deer, wild horses and many other desert grazing species.
I wish I could tap into the knowledge of indigenous cultures who have passed down their recipes for generations, but instead I set out with a local foraging book and the internet and learned how to harvest and cook from my wild desert garden.
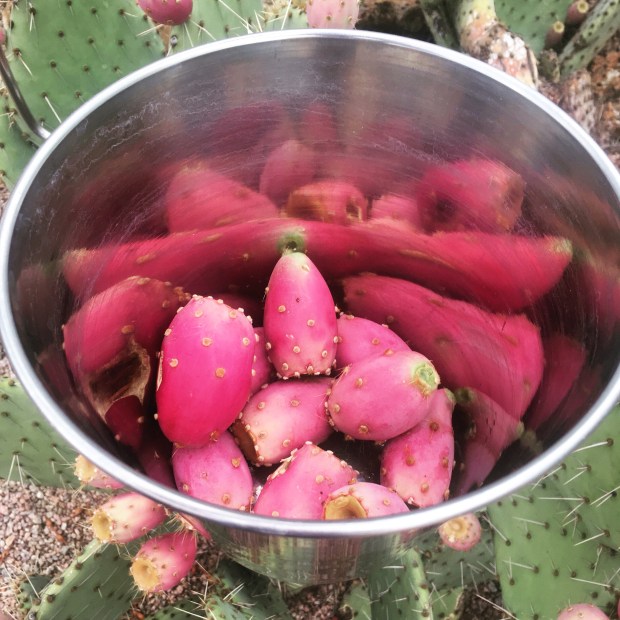
The Prickly Pear fruit must be harvested with tongs. I made use of some salad tongs and my stainless steel milk (usually used for milking the goat) pail to gather as many of the fruits as I could, quickly realizing that if I didn’t snag them a bit early, the Thrasher and Gila Woodpeckers (which I call the crazy zebra party bird because the males have zebra-striped wings and wear bright red party hats) would have their beaks in them before I could get to them. Don’t worry, I’ve left them some.
The information I found as to how to do this process seemed to leave out a lot of crucial and fine details. Having never done this before, my attempt was a lot of trial and error. Hopefully I can clarify all the areas where I had questions, now that I have done it sucessfully.
First, I rinse the fruits diligently in the bucket, not touching them with bare hands at all because they are still covered in the tiny, hairy glochids (barbs) that stick in your skin and swell. They itch and are a great nuisance. I let the fruits sit in the bucket on the counter for a few days to continue to ripen. If I attempted to pick them any later the birds would have already eaten them. Ripened fruit loses the long cactus barbs, but the tiny glochids remain. While rinsing the first time you may notice a lot of the longer barbs fall off, this is all part of the slow process of removing the glochids from the cactus juice you plan to consume.
Now that you have your fruits, plop the ripe fruit into a blender (a minimum of 5-10 of them if you want to make jelly or ice cream or other concoctions) and pulse. Pulsing pulverizes the pulp without blending in too much of the skin and and seeds. I find this method to be way easier than the numerous methods that discussed burning the glochids off over an open flame. There is another method that suggests freezing the fruits, in a mesh bag or strainer, then setting them out in the heat. As the fruits thaw, they shrivel and juice themselves (and you press out whatever doesn’t).
However you get the juice, the next step is to strain the mixture. Pour it into a large strainer over a stainless steel pail or bowl. You’ll want to stir with a long spoon and smash as much juice through the strainer as possible. Remember, at this point it still has glochids that can get into your skin, be careful. Let the mix drain over a bucket until it stops dripping and discard the thick pieces (or take an extra step and separate the seeds from the cactus pulp if you didn’t put them in the blender, to press into the highly coveted prickly pear oil, a process I’ll address in another blog).
Now take the rich magenta juice and strain it into another bowl through a fine mesh sieve for your second layer of straining. This will catch more pulp and and glochids. Then take the final liquid/juice and strain it through one final layer, through two layers of cheesecloth before using the juice in any products. This final juice is free of glochids, seeds and cactus pulp and ready to use in jams, jellies, syrups, margaritas, soaps, ice cream, mead, wine or any other Southwest delicacy you want to try!
My first try at Prickly Pear Jelly (and canning in general) lead to a syrupy liquid that I nearly conceded to using as pancake syrup. After a tip to try reboiling jelly that didn’t set, I used powder pectin (which is apparently the trick, do NOT use liquid or any other form of pectin) and saved my jelly.
Here is the recipe that worked:

- Rinse gathered Prickly Pear fruits.
- Retrieve fruit juice (by one of the methods above or your own).
- Go through three layer straining process as described above.

- 3 cups of prepared Prickly Pear juice (at least a bucket full of fruits)
- ½ cup lime juice (brings out flavor)
- 1 packet pectin powder (mix in slowly to reduce lumping)
- 4 cups sugar (you can add little less if you prefer)

- Begin boiling clean canning jars at a low boil with a little white vinegar added to keep the jars from getting cloudy while as you start the jelly mixture. Just before adding the jelly into the jars you can drop the lids also into the boiling water to soften the rubber rim before sealing the jars.
- Now begin your mixture. Heat Prickly Pear juice in a large pot on medium heat. Once heated, add lime juice and slowly begin mixing in pectin to avoid clumping. Mix in the sugar last and bring to a hard boil (hard boil =the water stays boiling as you stir) stirring constantly to keep juice from boiling over.
- Continue stirring at a hard boil for 10 minutes*.
- Let cool for a few minutes.
- Pour warm juice into the heated jars (I used tongs to carefully pull jars out of the boiling water, and then used a funnel to keep any liquid from touching the top rim area) leaving quarter inch at top. Heating the jars not only sanitizes them, but also makes them the same temperature as the jelly, keeping the glass from cracking when you pour hot liquid into it.
- Run a spatula along the top and sides if necessary to remove bubbles (bateria can grow in air bubbles).
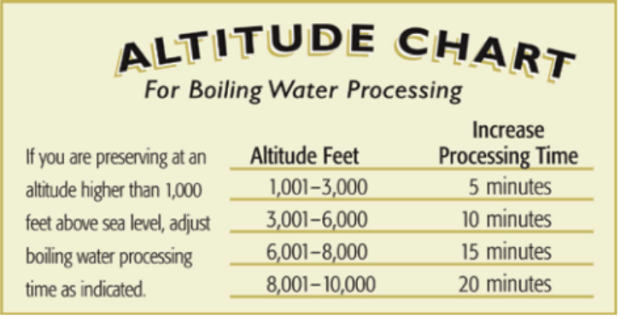
- Twist the lid tightly onto the jars, then place the jars back into the hot water and vinegar and boil for 5 minutes* (5 minutes is for those at sea level. This time must be adjusted per elevation).
- After 5 minutes you can turn the heat off and let the jars remain in the pot until all is cooled. I took the jars out and let them sit for 24 hours on the counter to see if the jelly would set. You’ll know if it has set or not by tipping the jar sideways and if it moves like a liquid, you’ll need to reboil and try the process again.
After 24 hours if your jelly has set it is ready to eat! Unopened, the boiled and sealed jars will last for quite some time out on the counter. Once opened, the jar must be refrigerated.
*Times listed here are for those at sea level. Use the chart below to adjust your time:
NOTE: This blog includes affiliate links, which means I may receive a nominal commission when you make a purchase at no additional cost to you. I have not been paid for my opinion and any commentary on the efficiency of a product is solely my own opinion and experience.

Hey 😀 Really love your post about the Prickly Pear! I am using the prickly pear cactus to purify water for a school project! If you want to know more about the project, here is the link:
If you like it, please leave a like on the video. The project is competing in a contests and we need a lot of likes to get to the next phase. Thanks! 😀